Posted on Leave a comment

How AI Is Revolutionizing Architecture & Design: Is It Possible With Free Open Source Tools?

A.I. Generated Architectural Render from a sketch input image, with extracted line and depth maps using ComfyUI Free Open Source Tools
Sketch Input to Generated Image Workflow in Architecture

Introduction

As an architect and artist deeply invested in design technology, I’ve always looked for tools that could free up time, unlock creativity, and streamline my workflow.

Today, artificial intelligence offers something remarkable — a way to go from sketch to photorealistic render in seconds, explore multiple iterations, test materials and moods, and even experiment with early 3D form — all without traditional 3D software, or expensive cloud services.

In this article, I’ll show you how these free, open-source tools can change how you work — whether you’re in architecture, interior design, product development, fashion, game design, or visual storytelling. And I’ll share a free guide you can download right now to get started with your own offline AI-powered workflow.

Why AI Matters for Designers, Architects & Visual Creators

AI tools are no longer just a novelty. They are powerful extensions of the creative process, enabling rapid visualization, concept development, and artistic exploration.

Instead of spending hours modeling and rendering a single view, you can now explore multiple versions, styles, and moods — then refine the most promising ones using your traditional tools.

From Sketch to Render in Minutes

Using AI-powered workflows, you can:

✅ Massing Studies

Generate quick volumetric compositions and design variations from loose sketches.

A.I. Generated Architectural Concept from Volumes Sketch

✅ Façade & Interior Exploration

Visualize materials, patterns, finishes, lighting scenarios, and moods without long render times.

A.I. Aided Facade and Materials Exploration

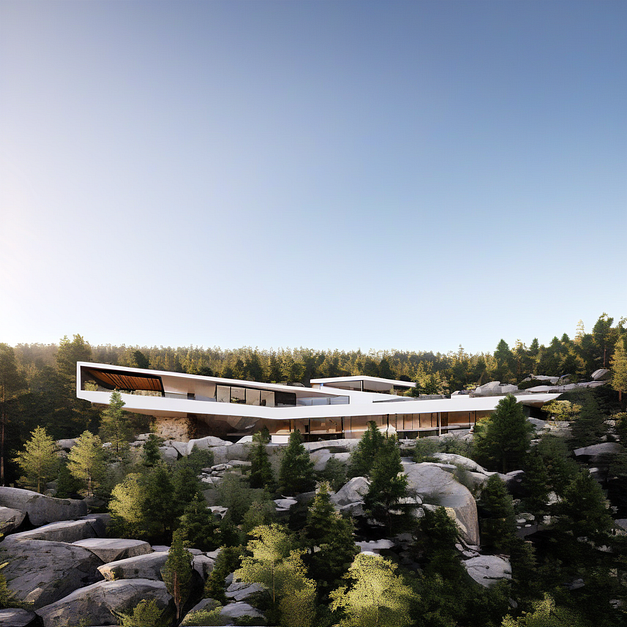
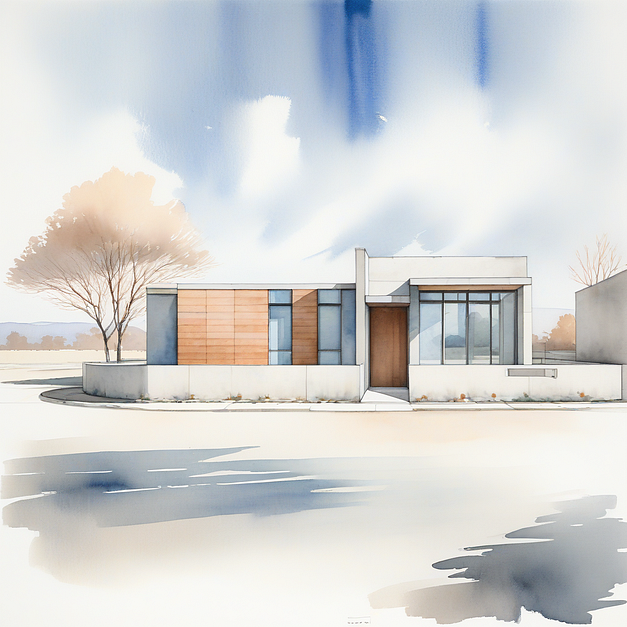
✅ Concept Visualization

Transform a napkin sketch into a watercolor painting, photorealistic render, or stylized concept drawing.

A.I. Generated Architectural Render from a Concept Sketch Input

✅ Stylized Outputs

Experiment with pencil, marker, watercolor, or other render styles.

Architectural Watercolor Painting Render

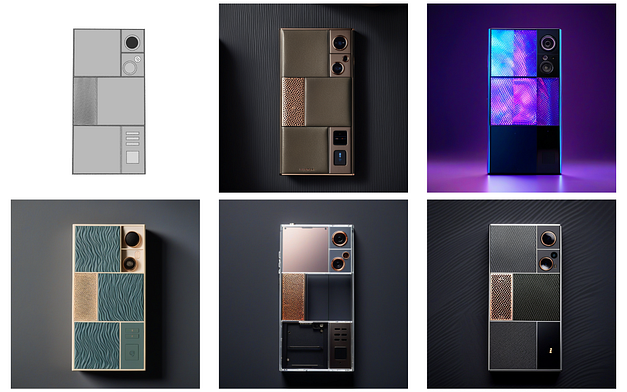
✅ Material & Texture Previews

Test different material palettes in seconds — even for products, furniture, or fashion.

Cellphone Concept — A.I. Generated Material Testing

✅ Image-to-3D Capabilities

Create early-stage 3D forms or massing models from one or more images — even furnitre, game characters, buildings or whole environments.

Generated 3D Model from a multiple Input Images

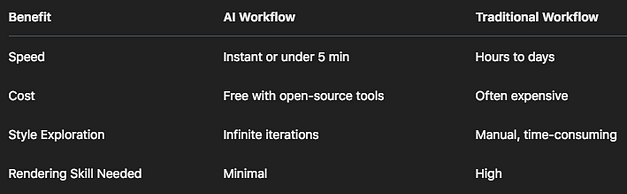
AI Image Generation vs Traditional Rendering

Limitations of AI in Design

AI doesn’t replace human creativity or technical precision. It can’t:

  • Understand spatial logic or building code.
  • Maintain consistent proportions or detail across iterations.
  • Replace CAD, BIM, or construction documentation.
  • Fully control output without a learning curve.
  • Guarantee copyright-safe content from models trained on public datasets.

Use AI as an exploration tool, not a replacement for design fundamentals.

Why Use Open Source Tools?

Most cloud-based services charge monthly or impose restrictions. But with tools like ComfyUI Portable, A1111 Stable Diffusion and InvokeAI you can run everything locally, with full control and for free.

Benefits of Running Locally:

✅ No subscription or generation credits costs

✅ Full privacy for your projects

✅ Better performance on powerful machines

✅ Custom workflows and flexibility

✅ Share the tool and workflows on your local network

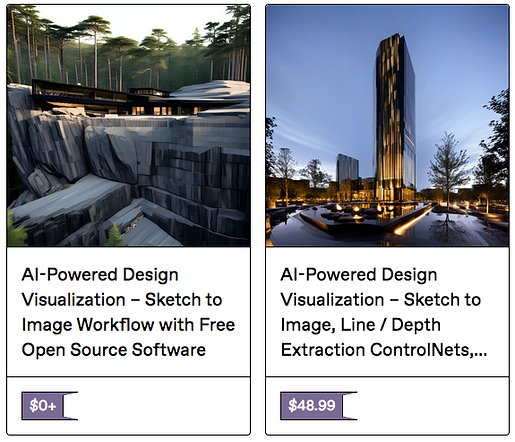
Start Free — Learn the Basics

Download the free guide to learn how to set up and use a very capable and flexible local sketch-to-image AI workflow using ComfyUI and other open-source tools.

It’s much easier that you think and does not require any technical knowledge or programming skills!

Sketch to Image Workflow

What’s Inside the Free Guide:

  • Installation of ComfyUI Portable
  • Custom image generation pipelines
  • Sketch-to-image rendering
  • Use of control nodes and models
  • Updating tools and expanding your workflow

👉 Download the FREE Guide on Gumroad

Unlock the Full Power of AI Workflows — The Full Guide

When you’re ready to go deeper, the Full Guide ($49.99) continues where the Free Guide ends, and is a complete toolkit that helps you:

  • Run ComfyUI as a server on your local network (ideal for studios)
  • Troubleshoot and optimize performance
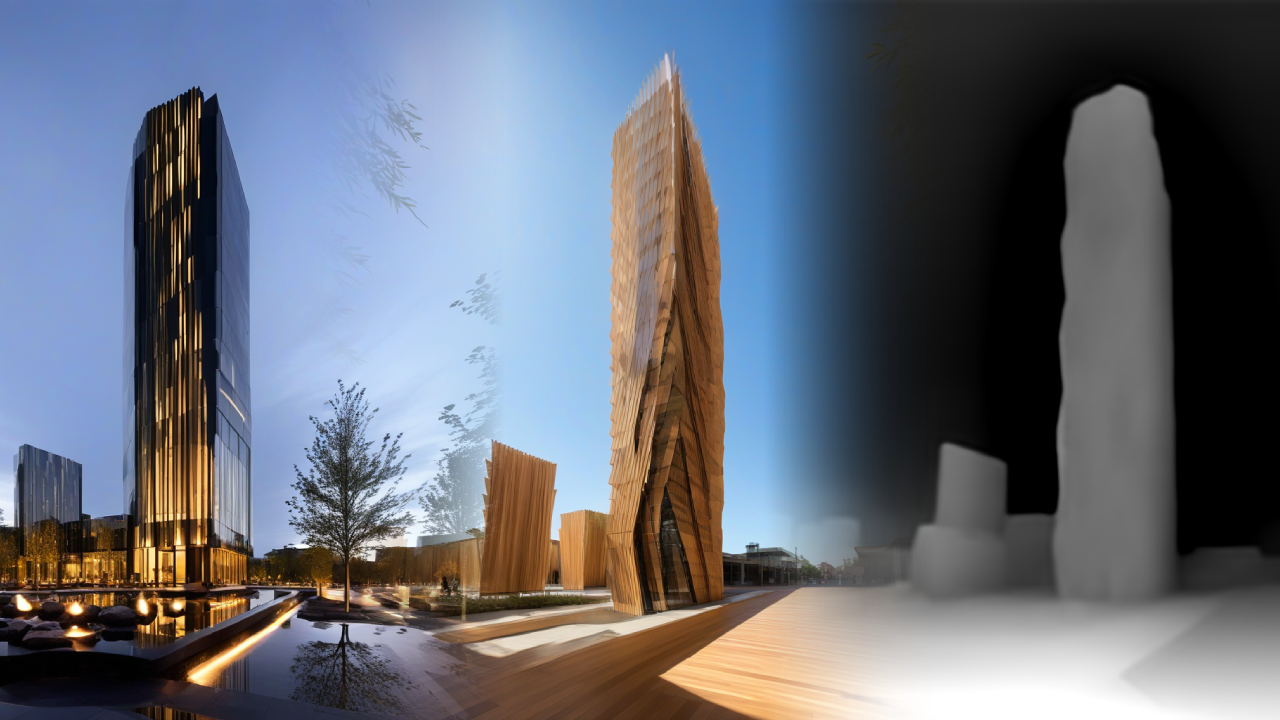
  • Use advanced tools like depth, line, and edge detection
  • Upscale images 4x or 8x
  • Explore tools for 3D generation from images and export to other 3D Software
  • Integrate multiple workflows and manage custom models

👉 Buy the Full Guide for $48.99 on Gumroad

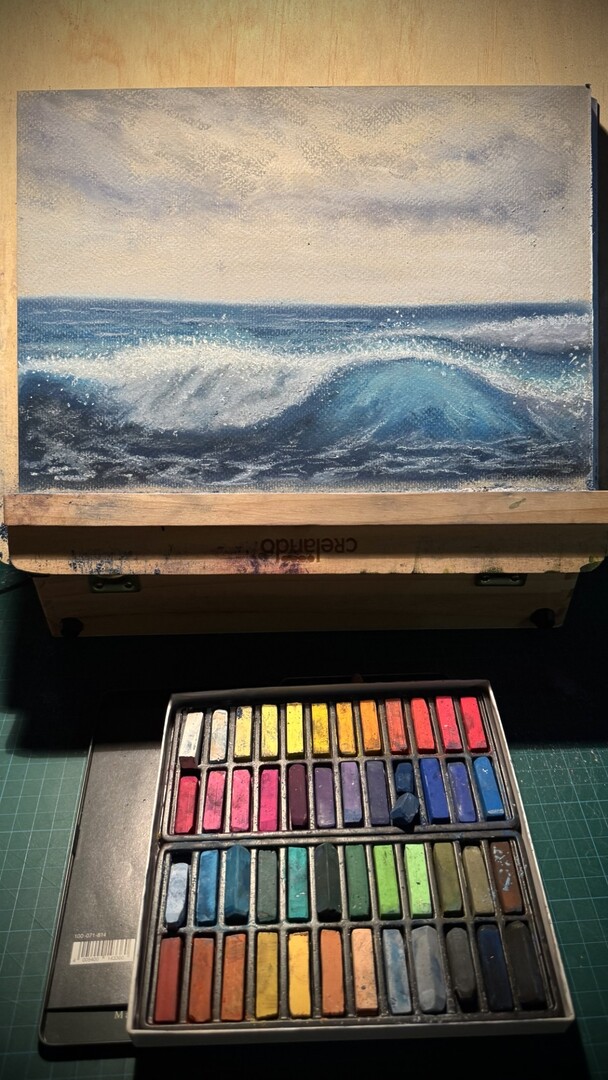
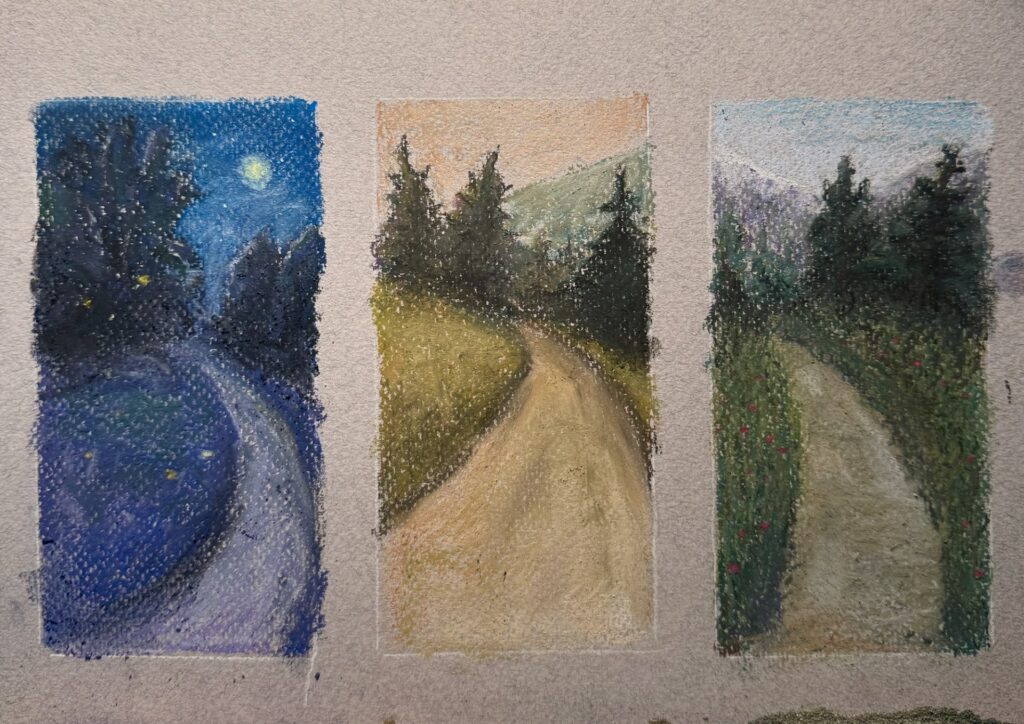
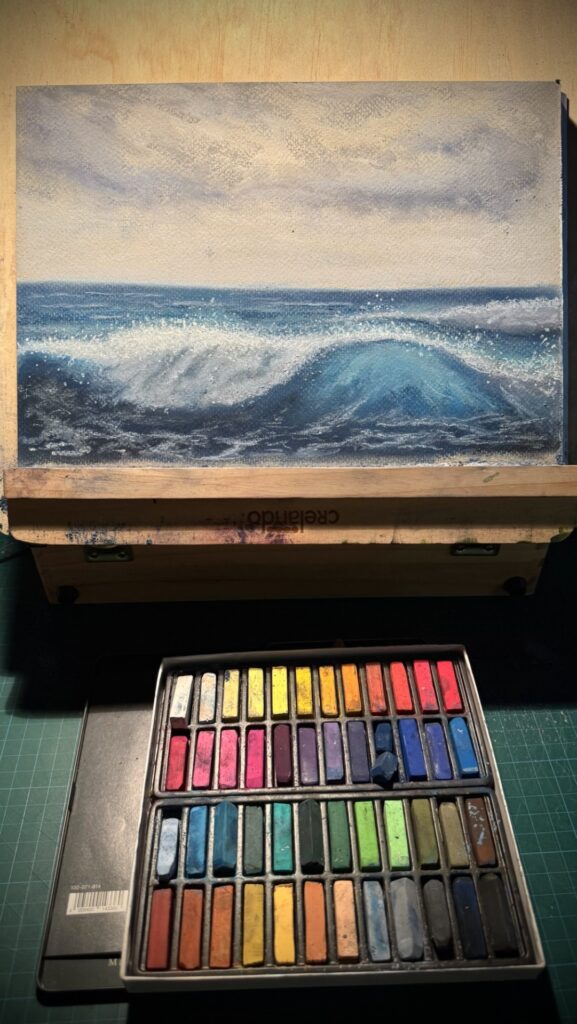
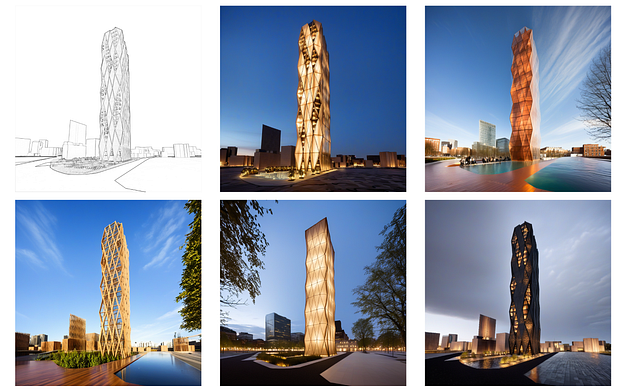
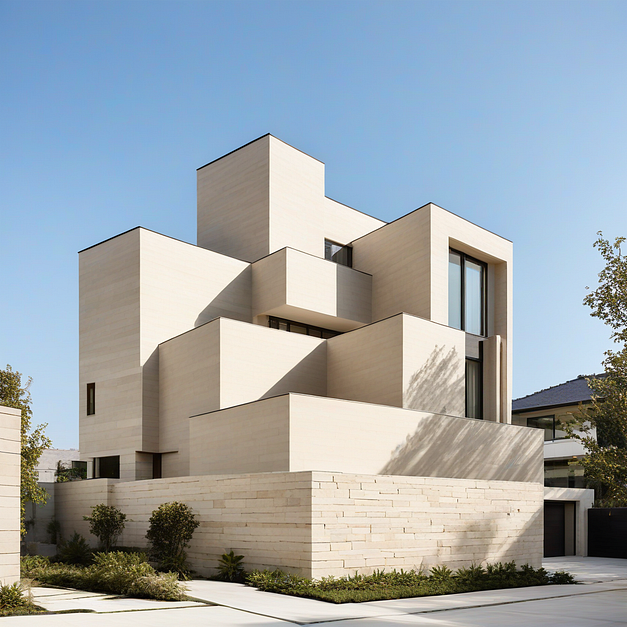
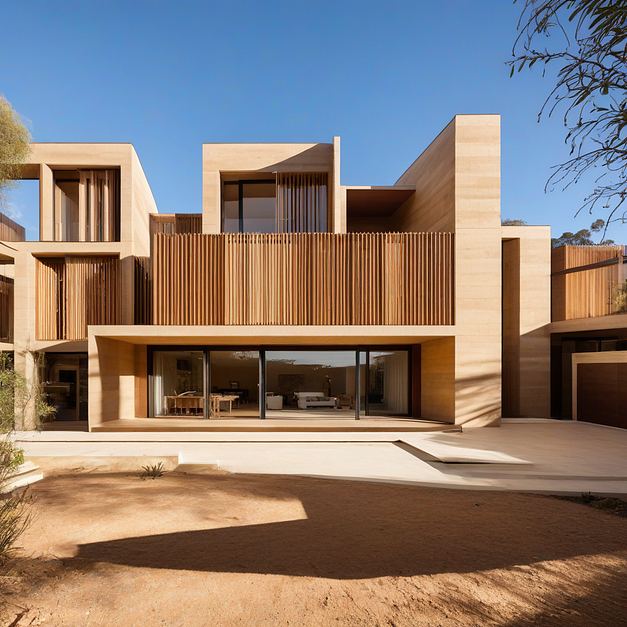
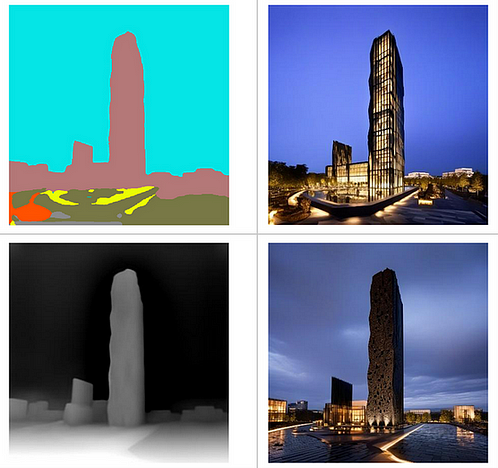
Real-World Examples from the Workflow

Here are a few examples generated through the pipeline:

Upscaling any Image in seconds
Generating a 3D Model from one or multiple images and importing in Blender is as simple as drag and drop
Extracting Lines and Depth Maps from any Image

Want to see more? I’ll be sharing ongoing updates and examples through my Medium, Reddit and Gumroad updates.

Minimum Hardware Requirements for Smooth Local AI

While you can technically run these tools on modest hardware, for the best experience:

  • GPU: 8GB VRAM or higher (NVIDIA preferred)
  • RAM: 16GB+
  • Storage: SSD recommended, at least 50–100GB free
  • OS: Windows 10/11 or Linux

Final Thoughts: Why This Changes Everything

We’re entering an era where AI is your assistant, your co-creator, and your visual experimentation tool. It can’t replace your skill as a designer — but it can radically enhance your process, giving you speed, variety, and freedom in early design stages.

Start with the free guide and try it for yourself. If it clicks, the full version gives you everything you need to build a pro-level AI visualization studio at home or in your practice with free open source tools.

👉 Explore the Free and Full Guides on Gumroad

Medium.com Article

Posted on

Faber Castell Soft Pastels (36 mini) – First Impressions and Review

A soft pastel painting of the sea and a big wave crashing on the shore

It’s been years since I last touched any kind of pastels, but for my birthday, I received a 36-mini set from Faber-Castell. So, I figured it was the perfect time to try again.

Exploring the Colors – First Studies:

Three Soft Pastel drawings of similar landscapes during different times of the day. Morning, late afternoon and evening lighting study

To get a feel for the set, I started with three small nature studies, each under different lighting conditions.
I wanted to understand the range of colors and how they interact with each other.
It was mesmerizing to watch the pigments blend, shifting and merging effortlessly under my fingertips. One of the things I really enjoyed was how light colors could cover darker ones—and vice versa—something you don’t get as easily with other mediums.

Bringing It All Together – A Sunset by the Lake

A soft pastel painting of a lake with the reflection of a warm sunset in the water and a forest in the background

After those initial studies, I moved on to a larger piece: a lake at sunset.
This painting was an attempt to combine the different palettes I had tested before, layering warm and cool tones to create depth.
I have to say, I love how vibrant the colors are—soft pastels really pop in a way that watercolor doesn’t.

Testing Detail – A Close-up Sea Scene

A soft pastel painting of the sea and a big wave crashing on the shore

For the final painting, I wanted to push things further and see how much detail I could achieve.
I chose a close-up sea scene, playing with a mix of blurry and sharp elements.
This was a great test of control, figuring out where I could refine edges and where to let the colors softly transition.

Final Thoughts

Painting with soft pastels is incredibly satisfying—the rich, velvety colors, the tactile blending—but it’s also very messy. If you’re thinking of trying them, just be prepared for dust-covered hands (and probably a desk that looks like a crime scene of color). But in the end, it’s absolutely worth it.

Have you tried soft pastels before? What’s your favorite way to use them? Let me know in the comments!

Posted on

La Villette Science Museum – Grid Facade Study in Watercolor

Watercolor painting of the grid structure in front of the Science Museum of Parc de la Villette in Paris, showcasing a white grid against a dark, colored facade.
highly detailed drawing of a grid facade, showcasing intricate architectural elements with precise lines and shadows. The composition emphasizes the rhythm and geometry of the structure, capturing the interplay of light and dark

This piece is the result of countless hours of focus and meticulous detail. Inspired by the geometry and rhythm of modern architecture, the grid facade allowed me to explore the interplay of light, shadow, and structure.

One of the greatest challenges in creating this piece was working within the intricate triangular grid without using masking fluid. Each line and shadow had to be drawn carefully by hand, ensuring that the delicate spaces between the triangles remained crisp and clear. It was a test of patience, precision, and a steady hand.

For the shading and textures, I used watercolors to create subtle variations, emphasizing the depth and complexity of the facade. Fineliners were instrumental in defining the sharp edges and giving the grid its structural integrity. The soft, warm tones in the reflective glass panes add a touch of light to the otherwise monochromatic composition, bringing a sense of balance to the overall piece.

This painting is not just about the facade itself; it’s about the process—the challenge of creating something precise, yet artistic, and the satisfaction of seeing the final piece come together. It’s a testament to how even the smallest details, when carefully considered, can create something striking and impactful.

Tools and Materials Used:

• Watercolors for shading and soft textures

• Fineliners for precision work

• Arches Cold Press paper for its texture and durability

Step-by-Step Process:

1. Sketch the Grid:

I began by lightly sketching the grid with a mechanical pencil. Using precise measurements, I ensured that all the triangles and lines were evenly spaced to create a clean and structured base.

Sketch of the grid facade

2. Paint the Base Layers:

I painted the first layer of colors and greys within the grid structure. Each section was carefully filled, avoiding the grid lines to maintain their crisp appearance.

First grey layer of watercolor on grid facade

3. Add Initial Shading:

I started shading the grid itself, giving it depth and dimension. At this stage, I also began enhancing the spaces in between the grid lines, carefully adding contrast and refining the overall look of the facade.

Colors and greys on the grid facade

4. Refine the Details:

To further define the facade, I built up additional layers of contrast and detail, focusing on areas that needed more depth. Watercolors were layered gradually to avoid overpowering the composition.

Fineliner details on the grid elements

5. Finish with Fineliner:

For the final touches, I added shading with a fineliner to enhance the sharpness and bring out the structure. This step helped emphasize the clean edges and made the intricate details pop.

This piece was both a challenge and a joy to create. If you’re attempting a similar project, I recommend taking your time with each step—precision and patience really pay off! Let me know if you have questions about the process or if you’d like to share your own projects. I’d love to hear from you!